
Help
Quick Start
Quick Start Workflow
- Fill in Course Info (title, location, date, judge)
- Drag signs from Sign Library onto the canvas
- Click Validate Course to check for errors
- Click Exports to generate PDFs, sign lists, or scoring sheets
Most Common Tasks
- Add signs: Drag from left sidebar onto canvas
- Insert into course order: Hold Shift (Windows) or Option (Mac) while dragging to insert into course order
- Replace sign: Dropping on existing sign replaces it
- Move sign position: Right-click to move a sign to a different position
- Rotate signs: Select sign, use toolbar buttons or Shift+←/→
- Copy/Paste: Select sign, click Copy button, then Paste (or Ctrl+C/V)
- Delete sign: Select and press Delete key, or right-click → Delete
- Create course set: Click "Create Set" button, add courses for different levels
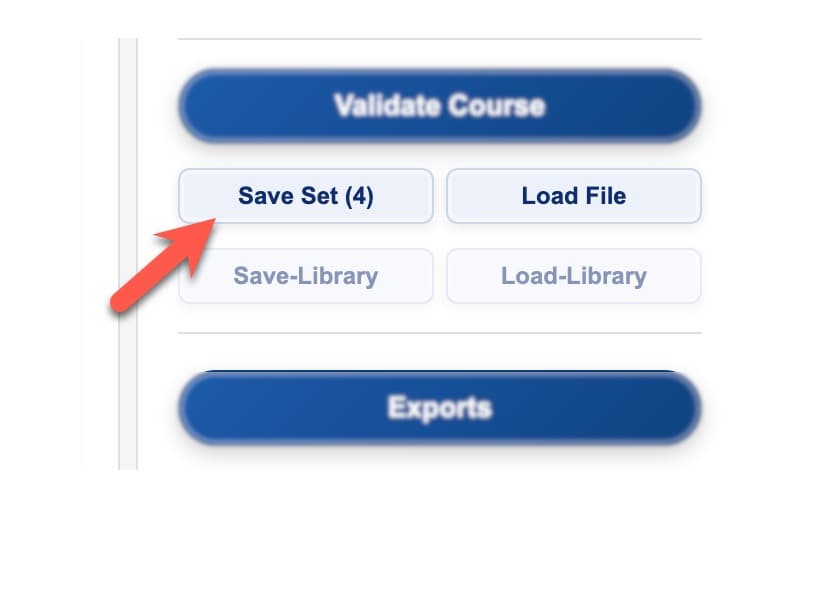
- Save/Load: Use Save File and Load File buttons in settings panel
Detailed Instructions
Click any section below to expand and learn more.
Building Your Course
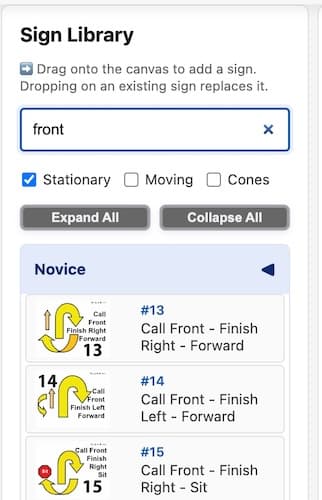
Sign Library
- Drag signs from library to canvas
- Search box to find signs quickly
- Filter by stationary/moving/cones
- Expand/collapse sign categories
Placing Signs
- Regular drag-and-drop places at end
- Dropping on existing sign replaces it
- Hold Shift (Windows) or Option (Mac) while dragging to insert into course order
Working with Signs
Selection & Manipulation
- Click to select a sign
- Rotate: Toolbar buttons (-90°, Reset, +90°) or Shift+←/→
- Fine rotation: Use slider below rotation buttons
- Copy/Paste: Toolbar buttons or Ctrl+C/V (Cmd on Mac)
- Delete: Delete key or right-click → Delete
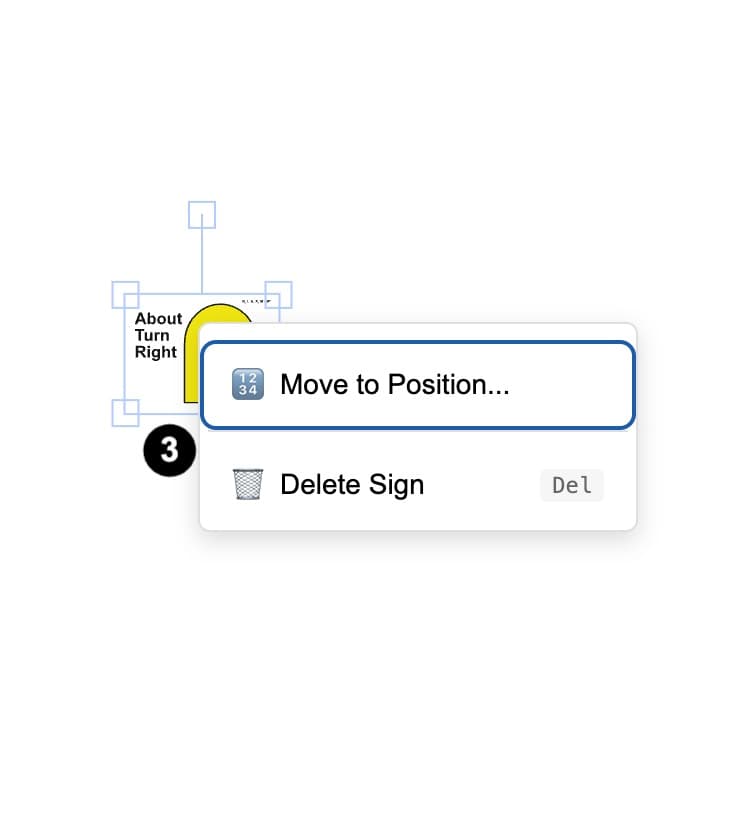
- Move to position: Right-click → Move to Position
Context Menu
- Right-click any sign for options
- Move to Position: Reorder signs in course sequence
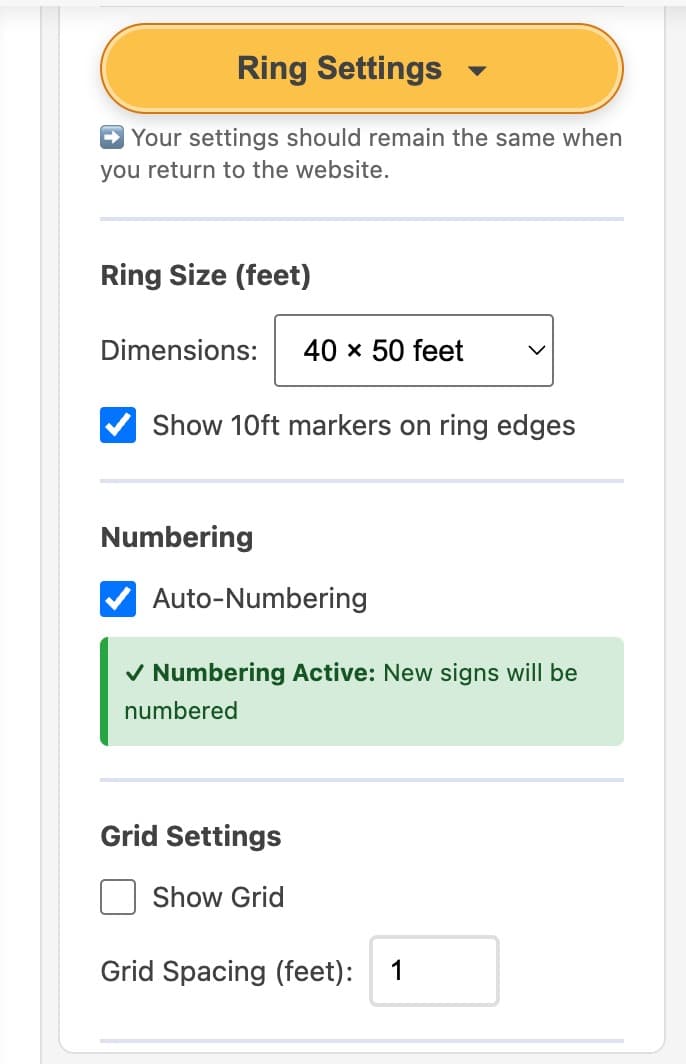
Ring Settings
Ring Size
- Standard sizes: 40×50 feet, 50×60 feet
- Custom dimensions available
- 10ft marker option for ring edges
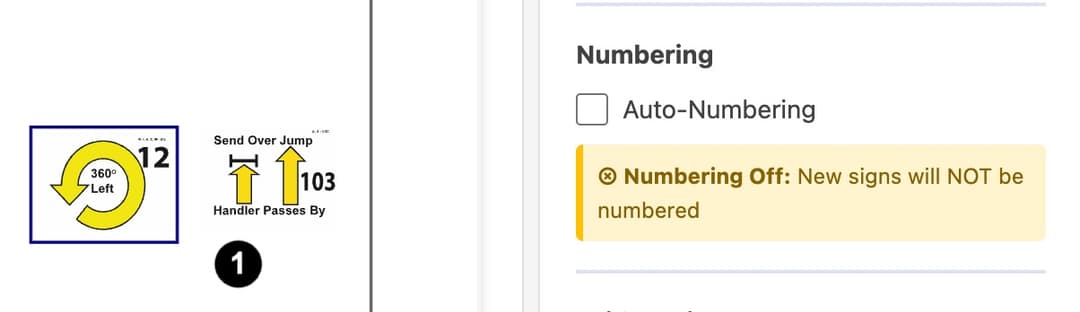
Numbering
- Auto-numbering toggle in Ring Settings
- Green status indicator shows when active
- Turn off to add alternate/unnumbered signs
Grid & Zoom
- Toggle grid on/off (Ctrl+G)
- Adjust grid spacing (0.5 to 5 feet)
- Zoom controls: +, Reset (⊙), - buttons or Ctrl+[+/-]
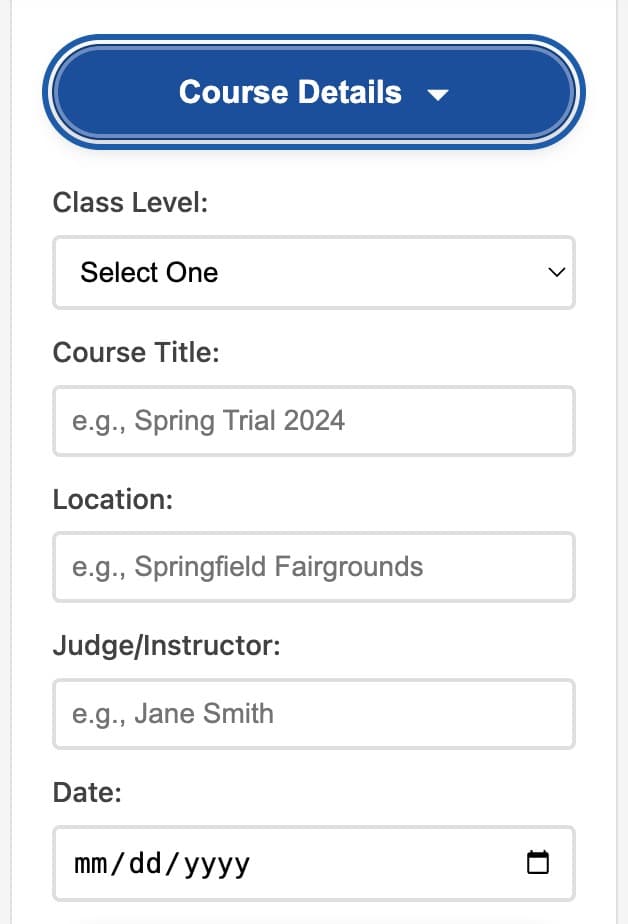
Course Details
- Purpose: Stores course title, location, date, judge name, and level
- Auto-copy: When you create a course set, Course Info copies to all courses
- Best practice: Fill in Course Info before creating a set
Course Sets
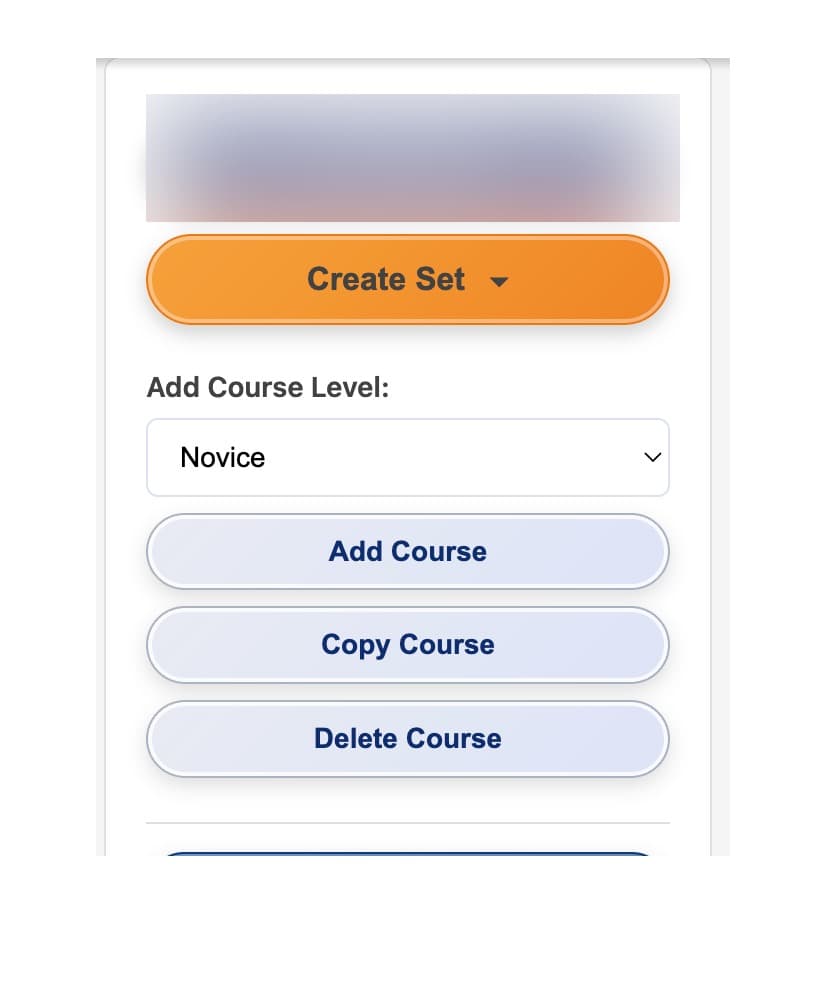
Creating Sets
- Click "Create Set" button in settings panel
- Fill Course Info first (copies to all courses)
- Add courses for different levels (Novice, Intermediate, Advanced, etc.)
Managing Courses
- Copy Course: Duplicates current course (change level, then edit)
- Delete Course: Removes course from set
Loading a Single Saved Course into a Set
- Step 1: Create a blank course set (click "Create Set" button) or add a blank course to an existing set
- Step 2: Select the blank course tab you want to load the saved course into
- Step 3: Click "Load File" button and select your saved course JSON file
- The saved course will load into the selected blank course in your set
Nested Courses
- Intermediate/Advanced: Validates using Intermediate rules
- Choice/Master: Validates using Master rules
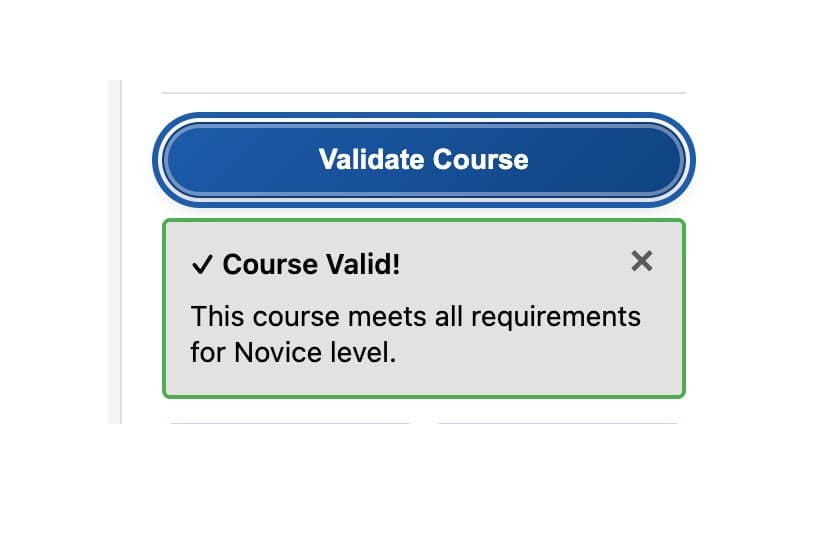
Course Validation
What It Checks
- START and FINISH signs present
- Level-specific rules (sign counts, required signs, stationary signs)
- Pace sequences (Fast, Slow, Normal)
- Duplicate sign warnings
How to Use
Click "Validate Course" button in settings panel
Add Unnumbered Signs to Nest a Course
Method 1
Turn off Auto-Numbering before adding sign (permanently unnumbered)
Method 2
Turn off Auto-Numbering after main course, add alternates, turn back on
Numbering Behavior
- When numbering resumes, it continues sequence, skipping unnumbered signs.
- The unnumbered signs are not included in the course validation.
- They will have a border around them on the map and will appear at the end of the Pull Sheet.
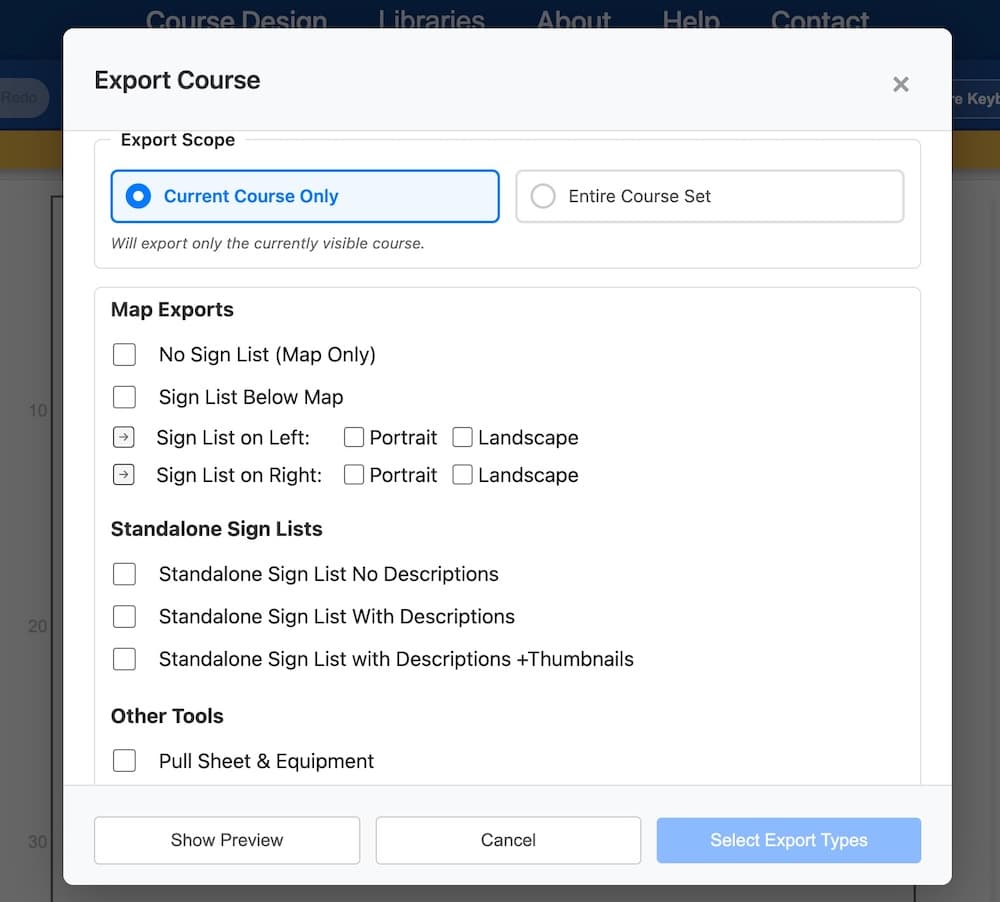
Export Options
Map Exports
- Portrait or Landscape orientation
- Sign list positions: Left, Right, Below, or None
- Preview layout before exporting
Standalone Sign Lists
- With descriptions and thumbnails: Full details for study/training
- Without descriptions: Clean list for posting
Other Exports
- Scoring sheets (with or without map)
- Equipment pull sheets (lists equipment needed)
Saving & Loading
- Save File: Downloads course as JSON file to your computer
- Load File: Upload saved JSON file to continue work
- File Format: JSON format
- Future: Cloud save will be available in your user account
- Best Practice: Save frequently, especially before major changes
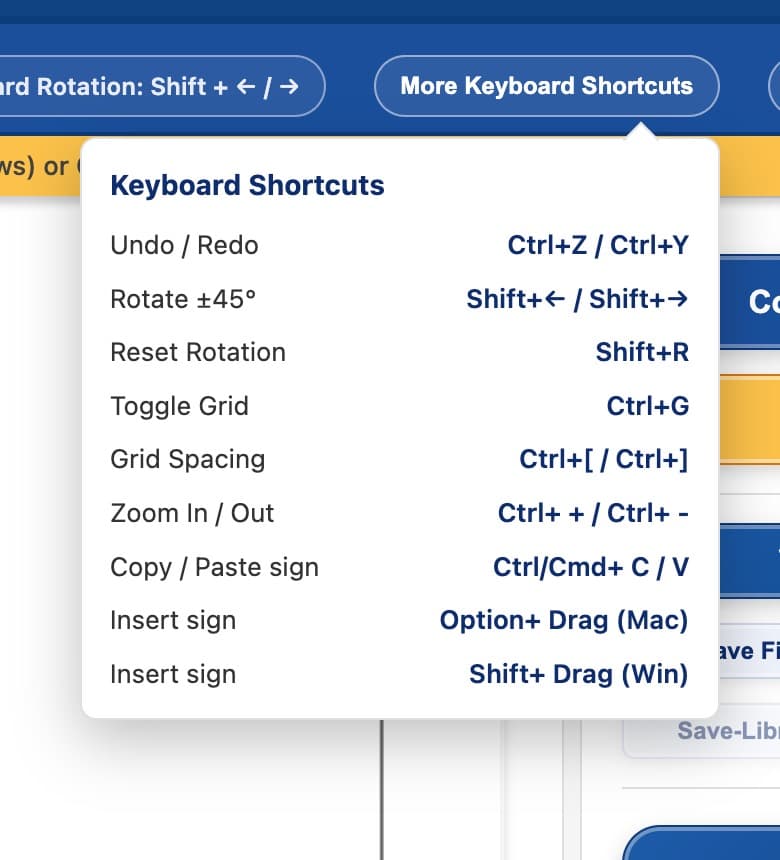
Keyboard Shortcuts
Most Useful
- Undo/Redo: Ctrl+Z / Ctrl+Y (Cmd on Mac)
- Rotate: Shift+← / Shift+→
- Reset Rotation: Shift+R
- Toggle Grid: Ctrl+G
- Zoom: Ctrl+[+/-]
- Copy/Paste: Ctrl+C/V (Cmd on Mac)
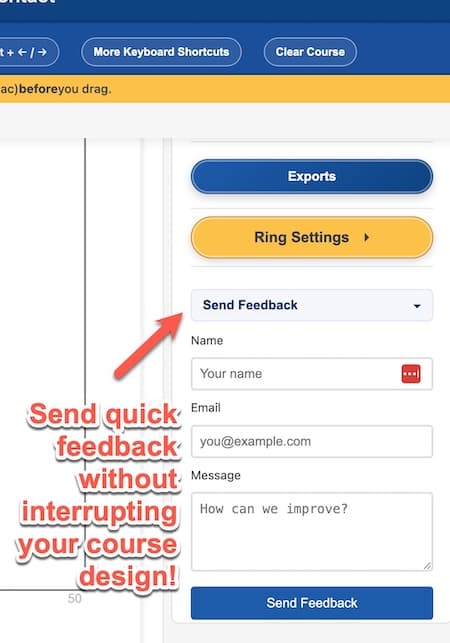
Full List: Click "More Keyboard Shortcuts" button in toolbar for complete reference
Still Need Help?
Visit the Contact page for additional support.